
Maintaining a clean Vitamix Ascent X5 is essential for ensuring its longevity and optimal blending performance. Proper cleaning prevents build-up, preserves blades, and keeps your smoothies tasting fresh. This guide provides clear, safe, and practical steps to keep your blender in top condition.
Key Takeaways
| Self-Cleaning Feature | Utilize the built-in Self-Cleaning Program for quick cleaning. |
| Manual Cleaning | Disassemble and clean parts regularly for thorough maintenance. |
| Blade Care | Check and replace blades with compatible assemblies when needed. |
| Avoid Harsh Chemicals | Use mild dish soap and warm water to prevent damage. |

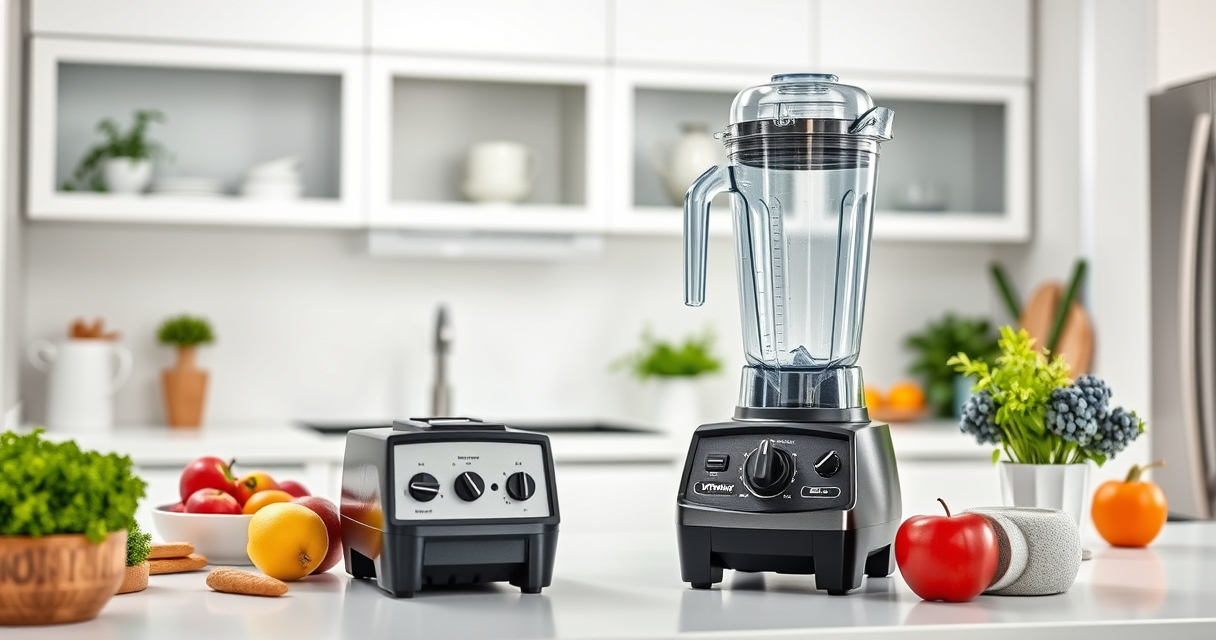
Vitamix Ascent X3 Blender with Three Blending Programs, Self-Cleaning Program, Professional-Grade Blender for Smoothies, Soups and More, Stainless-Steel Blades, 48 Oz Container, Shadow Black
Included: Ascent X3 blender motor base, 48-ounce container, S2 low-profile tamper, tamper holder, and digital recipe book; this...
As an affiliate, we earn on qualifying purchases.
Preparing to Clean Your Vitamix X5
- Unplug the blender from the power source to ensure safety.
- Remove the container from the motor base carefully.
- Disassemble the container if necessary, including the blade assembly.
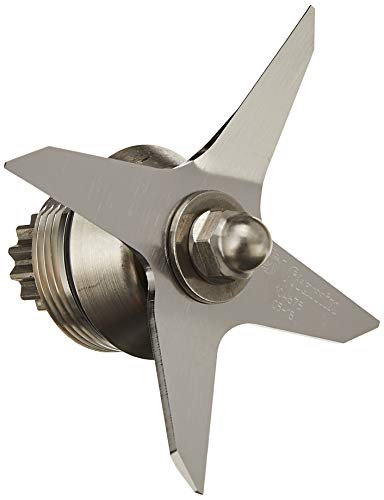
Vitamix Wet Blade Assembly, Silver
The Wet Blade Assembly is designed to be used with the 64-, 48-, and 32-ounce Standard Containers.
As an affiliate, we earn on qualifying purchases.
Using the Self-Cleaning Program
- Add warm water to the container, filling it about halfway.
- Insert a drop of dish soap into the water.
- Secure the lid tightly and select the Self-Cleaning Program on the control panel.
- Run the program; it will clean the blender in 60 seconds or less.
Manual Cleaning of Components
- Wash the container, lid, and tamper with warm, soapy water.
- Use a soft sponge or cloth to avoid scratching the surface.
- If necessary, disassemble the blade assembly and clean thoroughly, paying attention to crevices.
Cleaning the Blade Assembly and Replacement Tips
Inspect the blades regularly for wear or damage. Use a Vitamix Wet Blade Assembly (asin=B0028Y4CT6) if replacement is needed. Ensure blades are dry before reassembling to prevent corrosion.
Final Tips and Warnings
- Never immerse the motor base in water—only clean the exterior with a damp cloth.
- Avoid abrasive cleaners or steel wool that can scratch surfaces.
- Ensure all parts are completely dry before reassembling to prevent mold or odors.
The Products in This Guide

Vitamix Ascent X3 Blender
- ✔ Weight: 12 lbs
- ✔ Dimensions: 8 x 9 x 17 inches
- ✔ Warranty: 7 years

Vitamix Wet Blade Assembly
- ✔ Blade Diameter: 4 inches
- ✔ Weight: 2 lbs
- ✔ Warranty: 1 year
Vitamix Ascent X3 Blender
The Vitamix Ascent X5 offers an intuitive self-cleaning feature that simplifies maintenance. Regular cleaning ensures optimal performance and long-lasting durability.
Pros:
- Quick self-cleaning cycle
- Easy to disassemble parts
- High-quality stainless-steel blades
- Effective for daily use
Cons:
- Requires regular disassembly for deep cleaning
- Blade replacement may need compatible parts
Best for: Home users seeking a reliable, easy-to-clean blender
Not ideal for: Commercial settings needing heavy-duty, frequent deep cleaning
Bottom line: The Vitamix Ascent X5 balances performance with ease of maintenance, especially thanks to its self-cleaning feature.
Vitamix Wet Blade Assembly
This wet blade assembly is designed for quick replacement and ensures your Vitamix continues to crush ice and blend smoothly. Made with hardened stainless steel for longevity.
Pros:
- Long-lasting stainless steel blades
- Compatible with multiple container sizes
- Quiet operation
- Easy to install
Cons:
- Not compatible with newer containers
- Requires proper handling during replacement
Best for: Owners needing to replace worn or damaged blades
Not ideal for: Using with containers not compatible with this blade assembly
Bottom line: A dependable blade assembly that keeps your Vitamix blending at peak performance.
Frequently Asked Questions
Can I put all parts in the dishwasher?
Only the container and lid are dishwasher safe. Avoid dishwasher cleaning for the motor base and blade assembly—clean these manually.
How often should I clean my Vitamix?
It’s best to run the Self-Cleaning Program after every use, and manually clean the parts weekly or as needed to prevent buildup.
What should I do if the blender isn’t cleaning properly?
Check for blockages, ensure the lid is secure, and run the Self-Cleaning Program again. Disassemble the blades for a thorough cleaning if necessary.
Can I replace the blade assembly myself?
Yes, using the Vitamix Wet Blade Assembly (asin=B0028Y4CT6), which is designed for easy on-site replacement with compatible containers.
Keeping Your Vitamix X5 in Top Shape
Regular cleaning using the self-cleaning feature and manual maintenance of the blades will extend the life of your Vitamix Ascent X5. Always handle parts carefully and avoid harsh chemicals to ensure safe and effective cleaning. With proper care, your blender will continue to deliver smooth, delicious results for years to come.
Affiliate disclosure: As an Amazon Associate we earn from qualifying purchases. Prices and availability are accurate as of the time of publishing.